I have created a booted microSD card’s clone and saved the cloned image on Windows Desktop through LAN using following procedure:
(1) On Windows computer, (a) created a folder rpi-clone to hold the cloned img files, (b) enabled Network Sharing, and ( c) granted sharing permission to folder rpi-clone.
(2) On RPi, created a folder /home/pi/Windows-Share and mounted on it Windows shared folder rpi-clone.
Mounted Windows folder rpi-clone to RPi folder /home/pi/Windows-Share
## IP address of Windows PC = 192.168.0.10
## User name of Windows PC = abcd
## Shared folder on Windows PC = rpi-clone
## Mount-point folder on RPi = /home/pi/Windows-Share

pi@raspberrypi:~ $ sudo mount.cifs //192.168.0.10/rpi-clone /home/pi/Windows-Share -o user=abcd
Password for abcd@//192.168.0.10/rpi-clone:  ********
For items (1) and (2) above, see detailed instructions here:
pi@raspberrypi:~ $ sudo raspiBackup.sh -a : -o : -m detailed
--- RBK0009I: raspberrypi: raspiBackup.sh V0.6.5.1 (a056338) started at Sat 04 Jul 2020 08:17:59 PM EDT.
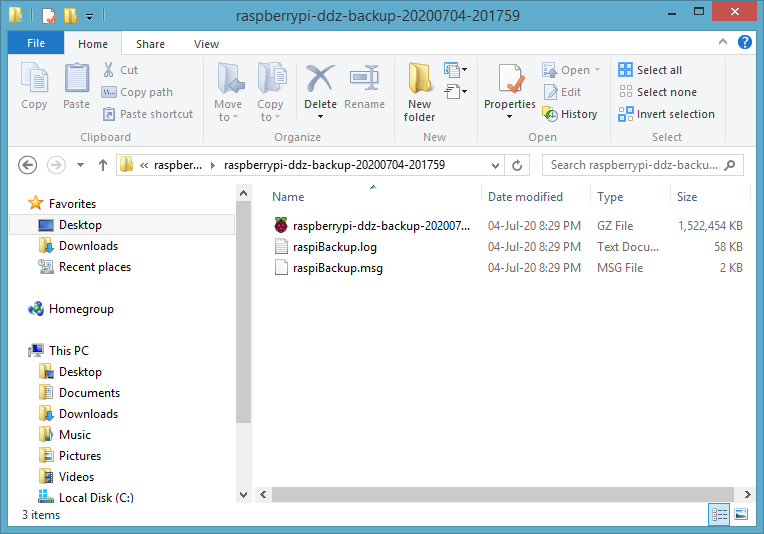
--- RBK0128I: Using logfile /home/pi/Windows-Share/raspberrypi/raspberrypi-ddz-backup-20200704-201759/raspiBackup.log.
--- RBK0116I: Using config file /usr/local/etc/raspiBackup.conf.
--- RBK0151I: Using backuppath /home/pi/Windows-Share.
!!! RBK0157W: No services to stop.
--- RBK0081I: Creating backup of type ddz in /home/pi/Windows-Share/raspberrypi/raspberrypi-ddz-backup-20200704-201759.
--- RBK0085I: Backup of type ddz started. Please be patient.
7580+0 records in
7580+0 records out
7948206080 bytes (7.9 GB, 7.4 GiB) copied, 702.271 s, 11.3 MB/s
--- RBK0078I: Backup time: 00:11:43.
 !!! RBK0156W: No services to start.
--- RBK0159I: 3 backups kept for ddz backup type.
--- RBK0205I: Deleting oldest backup in /home/pi/Windows-Share/raspberrypi. This may take some time. Please be patient.
--- RBK0033I: Please wait until cleanup has finished.
--- RBK0049I: Messages saved in /home/pi/Windows-Share/raspberrypi/raspberrypi-ddz-backup-20200704-201759/raspiBackup.msg.
--- RBK0026I: Debug logfile saved in /home/pi/Windows-Share/raspberrypi/raspberrypi-ddz-backup-20200704-201759/raspiBackup.log.
--- RBK0010I: raspberrypi: raspiBackup.sh V0.6.5.1 (a056338) stopped at Sat 04 Jul 2020 08:29:48 PM EDT with rc 0.
--- RBK0017I: Backup finished successfully.
The backup took a bit longer than yours because the card is double the size.
Anyway, once it was done, I shut the Pi down, reflashed the SD card with a fresh Buster install and then reflashed it again with the image that this had saved.
Confirmed
This is good, I like it. I’m going to see if I can get it to write to a shared folder on my NAS and if that works, I’ll start setting up some schedules.
I know that this sort of “one step install” approach is popular… but it’s roughly equivalent to “run this .exe email attachment as administrator”. Be aware of what you’re doing.
15 Minutes for copying the image over network? Then i do misunderstand what the script is doing
I tried a backup of my card to my NAS and it ended up in a 64 GB image which took over an hour to create it
Probably - There’s no need to… My install is around 3 GB, incl. VRS, etc. I have both 16 and 32 GB cards, but the 32 GB one is running a 16 GB image. No need to stretch the partition, it only takes longer to restore.
Usually larger cards are more reliable on long runs, i’ve read this several times.
Anyways, i do not have a special config in use and the reinstall from scratch takes me less than an hour… I was just curious about the time savings.
Understood, I did download the script manually and take a look first. As you say, it’s important to be aware of what things do and not just blindly follow instructions. I’m not a coding genius though but from what I could see, it looked fine to me.
I agree with this to an extent but I’d imagine that the sort of person who would find this useful is someone who has tinkered and tweaked their setup. It’s also very useful for when a Pi is mounted in a location that isn’t easily accessible, in the loft, up a mast etc.
It’s not just about any time saving, it’s the convenience and for me, just knowing I have a backup of the Pi that’s at the top of my mast makes it well worth setting this up to run once a week, especially if I can make it work to my NAS.
I’m not sure using sudo dpkg -i on some deb you just downloaded is that much better.
In the end it comes down to trusting the party from which you are downloading w/e piece of software you’re installing.
Would you think making for example tar1090 into a debian package that gets installed with sudo dpkg -i would improve things?
I’ve thought about this a couple of times because i do a agree sudo bash isn’t really what you want.
I suppose the advantage of open source software is that anything malicious is there to see in plain sight. Although not everyone can read the code to determine that, there will usually be someone with enough knowledge to pick something up unless it’s very well obfuscated.
I agree, but the most common problems are broken SD cards etc, so you have to replace it anyhow physically.
Friend of mine has the installation made on a church tower, the device was not accessible any longer after certain amount of time.
After he exchanged the SD card he identified that the old one simply ran into space issues because the log folder filled up the card.
At the end the card could be reused by free up the space, but even this required physical access as the device wasn’t reachable via network any longer.b
I think you’re missing the point a bit. At the moment, my Pi at the top of my mast isn’t backed up. If I want to make a backup, I need to lower the mast, shut it down, take the card out, back it up and then reverse the process.
With a regular backup like this, I’m at least a little more protected. If it fails, all I need to do is go to my most recent backup, write a new SD card and then go through the physical effort to get to the Pi. My setup isn’t standard, it’s probably got a good few tweaks on it since I first built it so this is very useful to me.
Now I’ve got the share on my NAS set up, all I have to do is log on to the Pi, create a mount point, install and configure the backup software then forget about it until I need it.
It’s not, really. In both cases you have to entirely trust the origin server. If it’s compromised, you’re hosed. https will help against some attacks but if the server itself goes bad…
An apt repository is somewhat safer because then - at least once you’ve got the signing public key onto the system somehow, which is an issue in itself - compromising the origin server doesn’t get an attacker much, you have to compromise the signing key too which is usually going to be held offline / secured with a passphrase that requires a human in the loop to sign stuff.